It is a truth which is by no means universally acknowledged, but one of which I hope shortly to persuade the reader, that introducing speed to 11-14 year-old students as speed=distance÷time or s=d ÷ t is not the most pedagogically effective approach.
This may initially seem like perverse idea since surely s = d ÷ t and s × t = d are mathematically equivalent expressions? They are, but it is my contention that many students find expressions of the format s = d ÷ t more cognitively demanding that s×t=d. This is because many students struggle with the concept of inverse relationships, particularly those involving multiplication and division.
[Researchers have] suggested that multiplicative concepts may be more difficult to acquire than additive ones, and speculated that although addition and subtraction concepts and procedures extend to multiplication and division, the latter also include unique aspects unrelated to addition and subtraction.
Robinson and LeFevre 2012: 426
In short, many students can handle solving problems such as a + b = c where (say) the numerical values of b and c are known. This can be solved by performing the operation a + b – b = c – b leading to a = c – b and hence a solution to the problem. However, students — and many adults(!) — find solving a similar problem of the format a=b÷c much more problematic, especially in cases when b÷c is not a simple integer.
Compounding students’ inability to utilise multiplicative structures, is their failure to recognise the isomorphism between proportion problems. Another possible reason is that a reluctance or inability to deal with the non-integer relationships (‘avoidance of fractions’), coupled with the high processing loads involved, seems to be the likely cause of this error
Singh 2000: 595
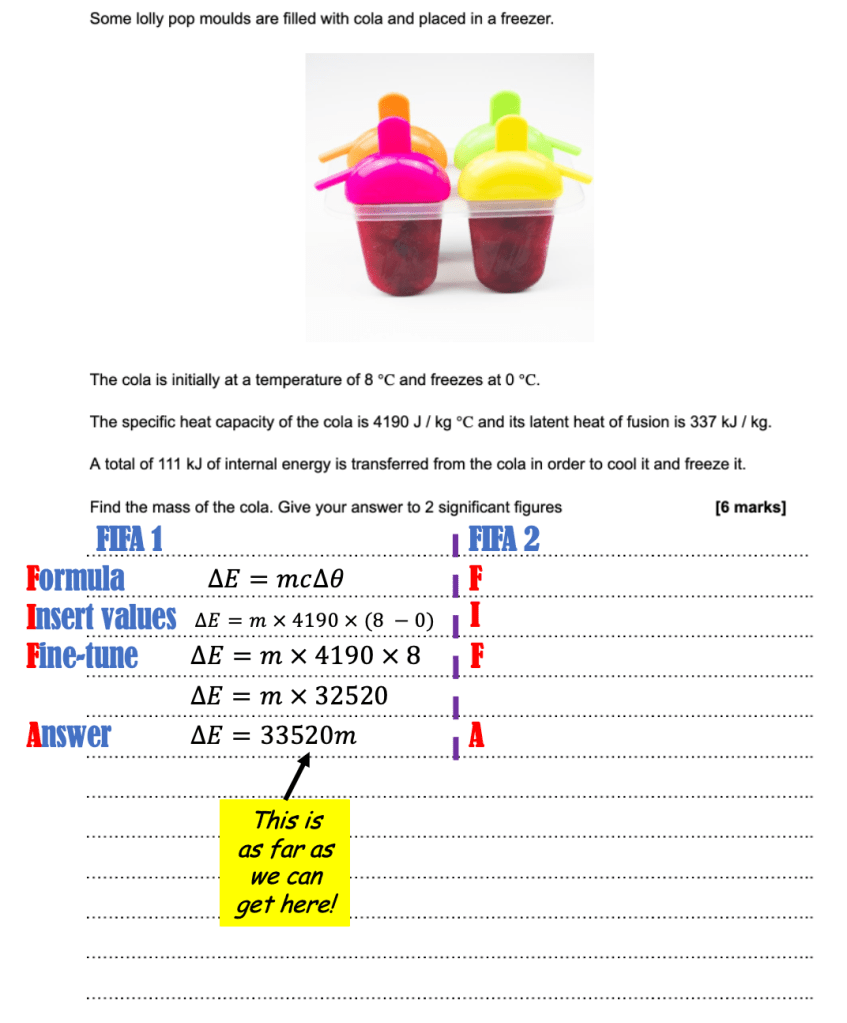
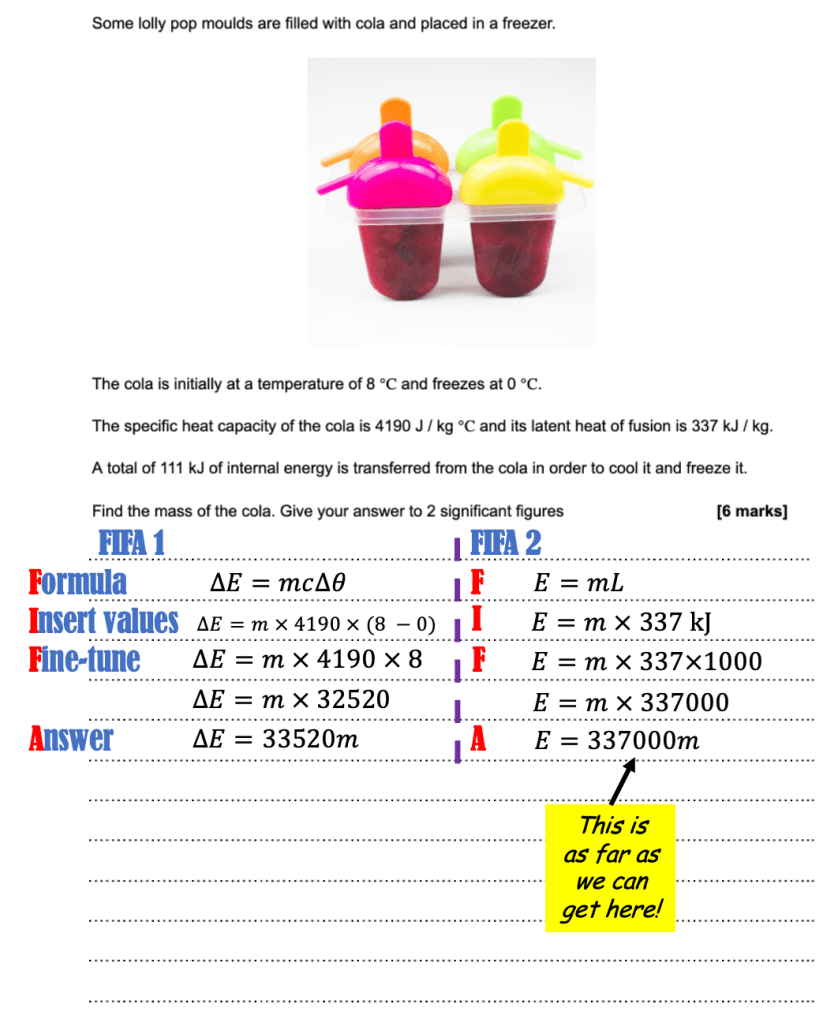
The problem with the s=d÷t format
In this analysis, we will assume that a direct calculation of s when d and t are known is trivial. The problem with the s=d÷t format is that it may require students to apply two problem solving procedures which, to the novice learner, have highly dissimilar surface features and whose underlying isomorphism is, therefore, hidden from them.
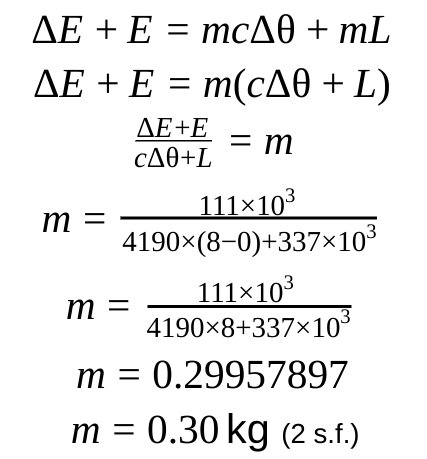
- To find d if s and t are known, they need to multiply both sides by t (see Example 1).
- To find t if s and d are known, they need to divide both sides by s and then multiply both sides by t (see Example 2)


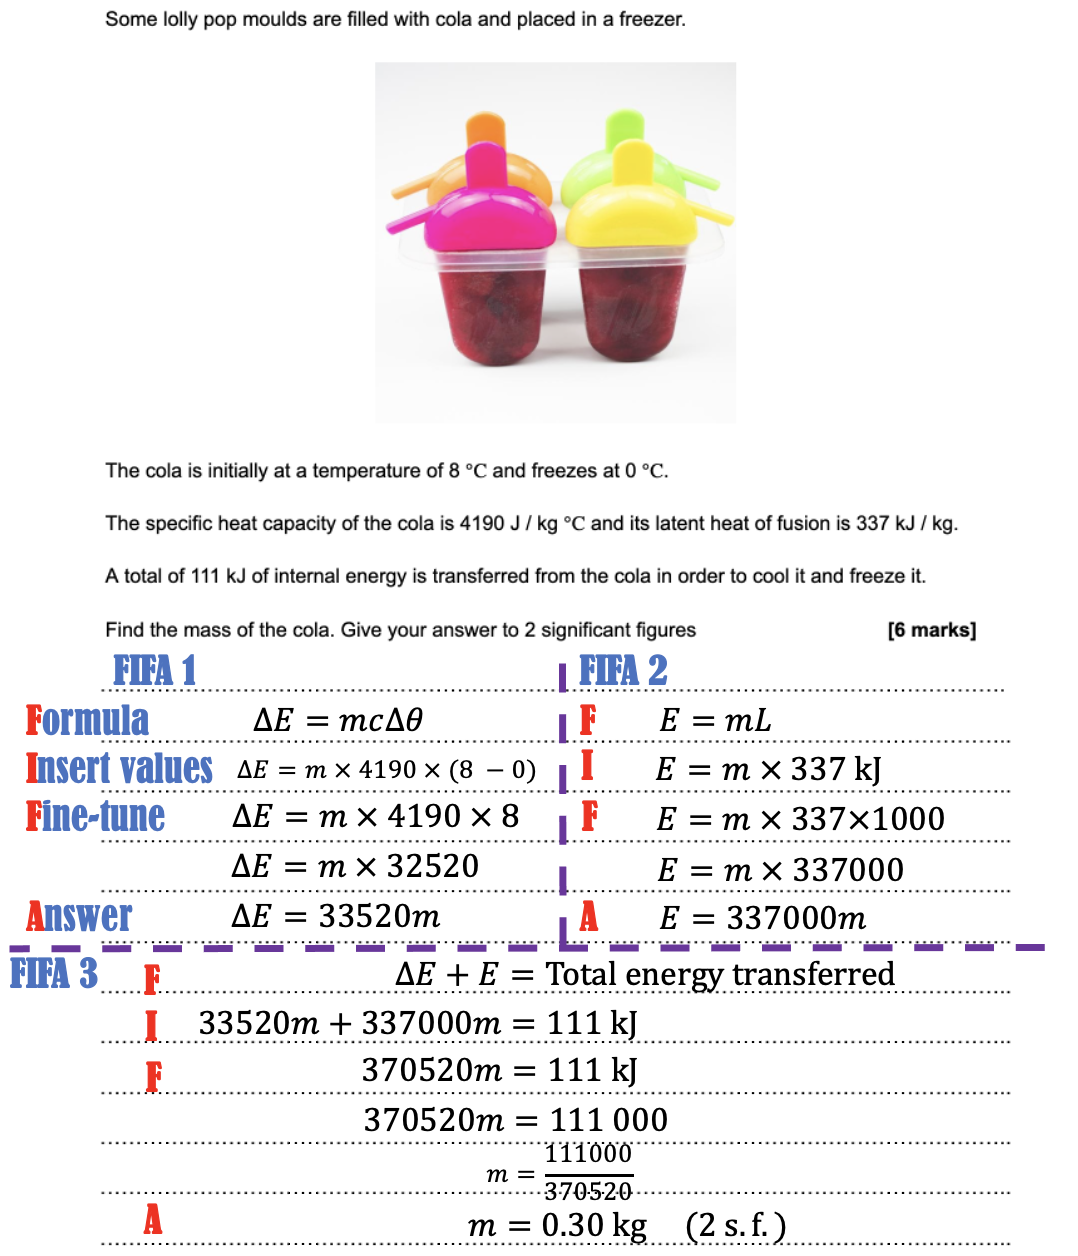
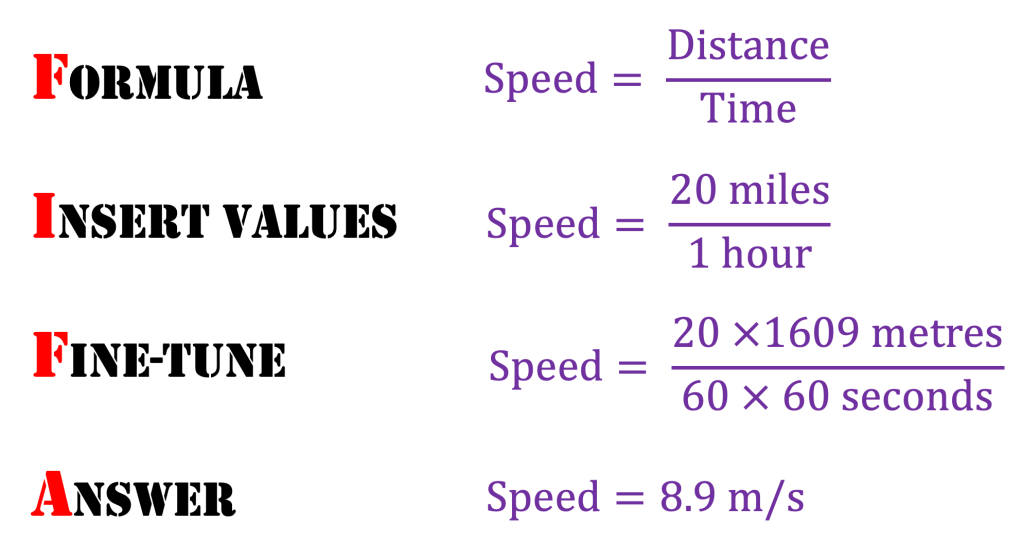
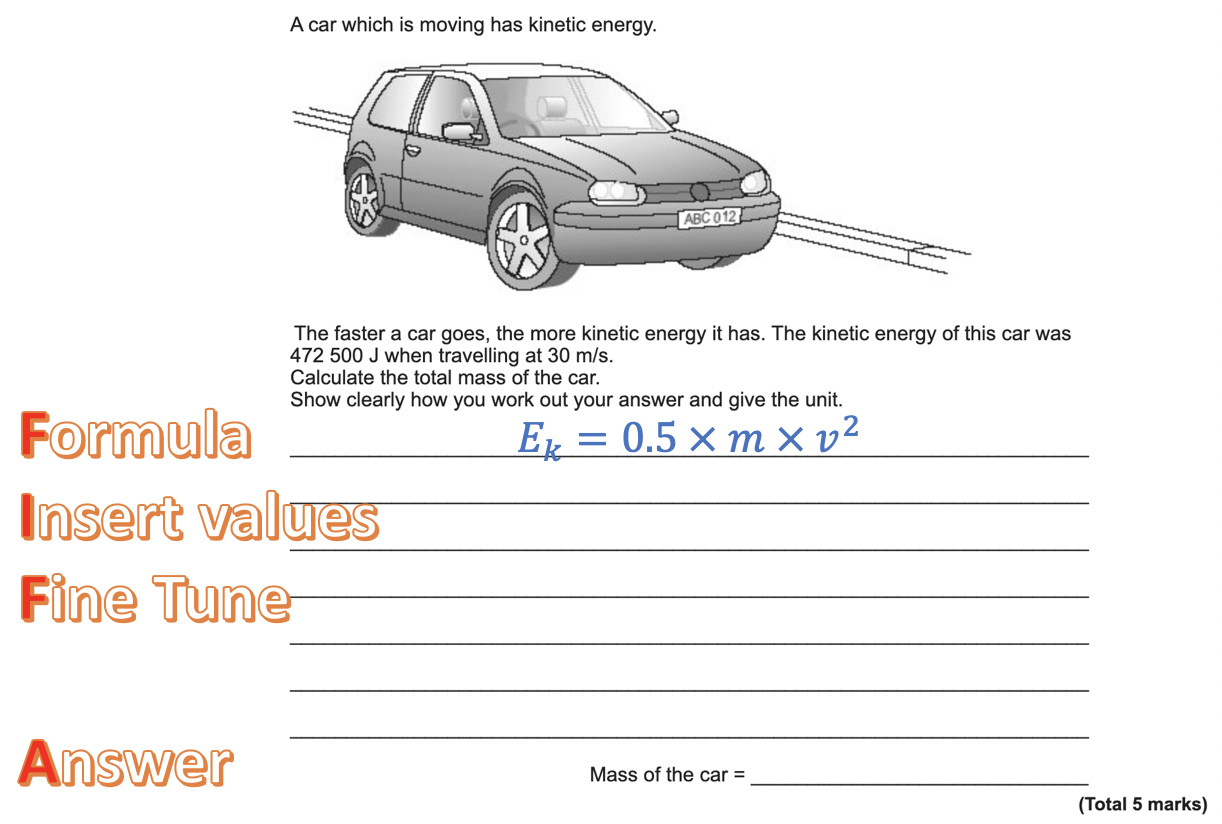
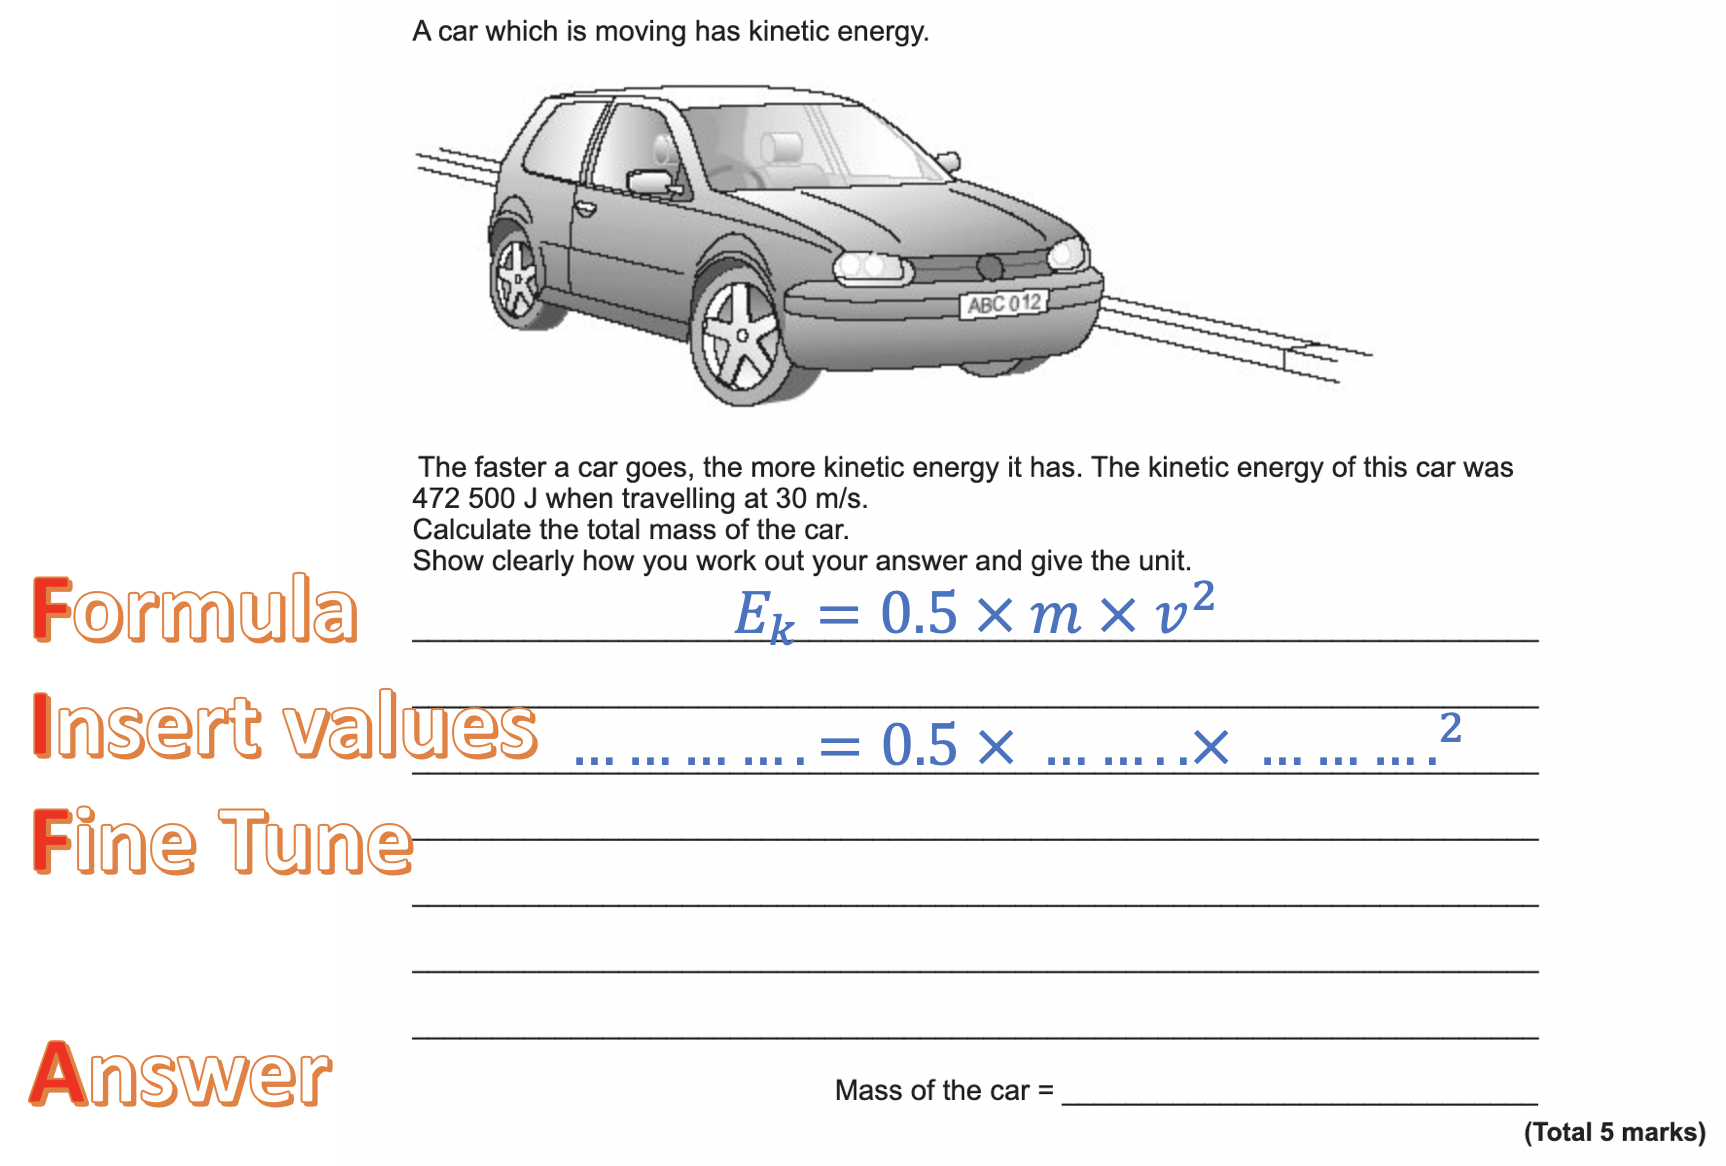
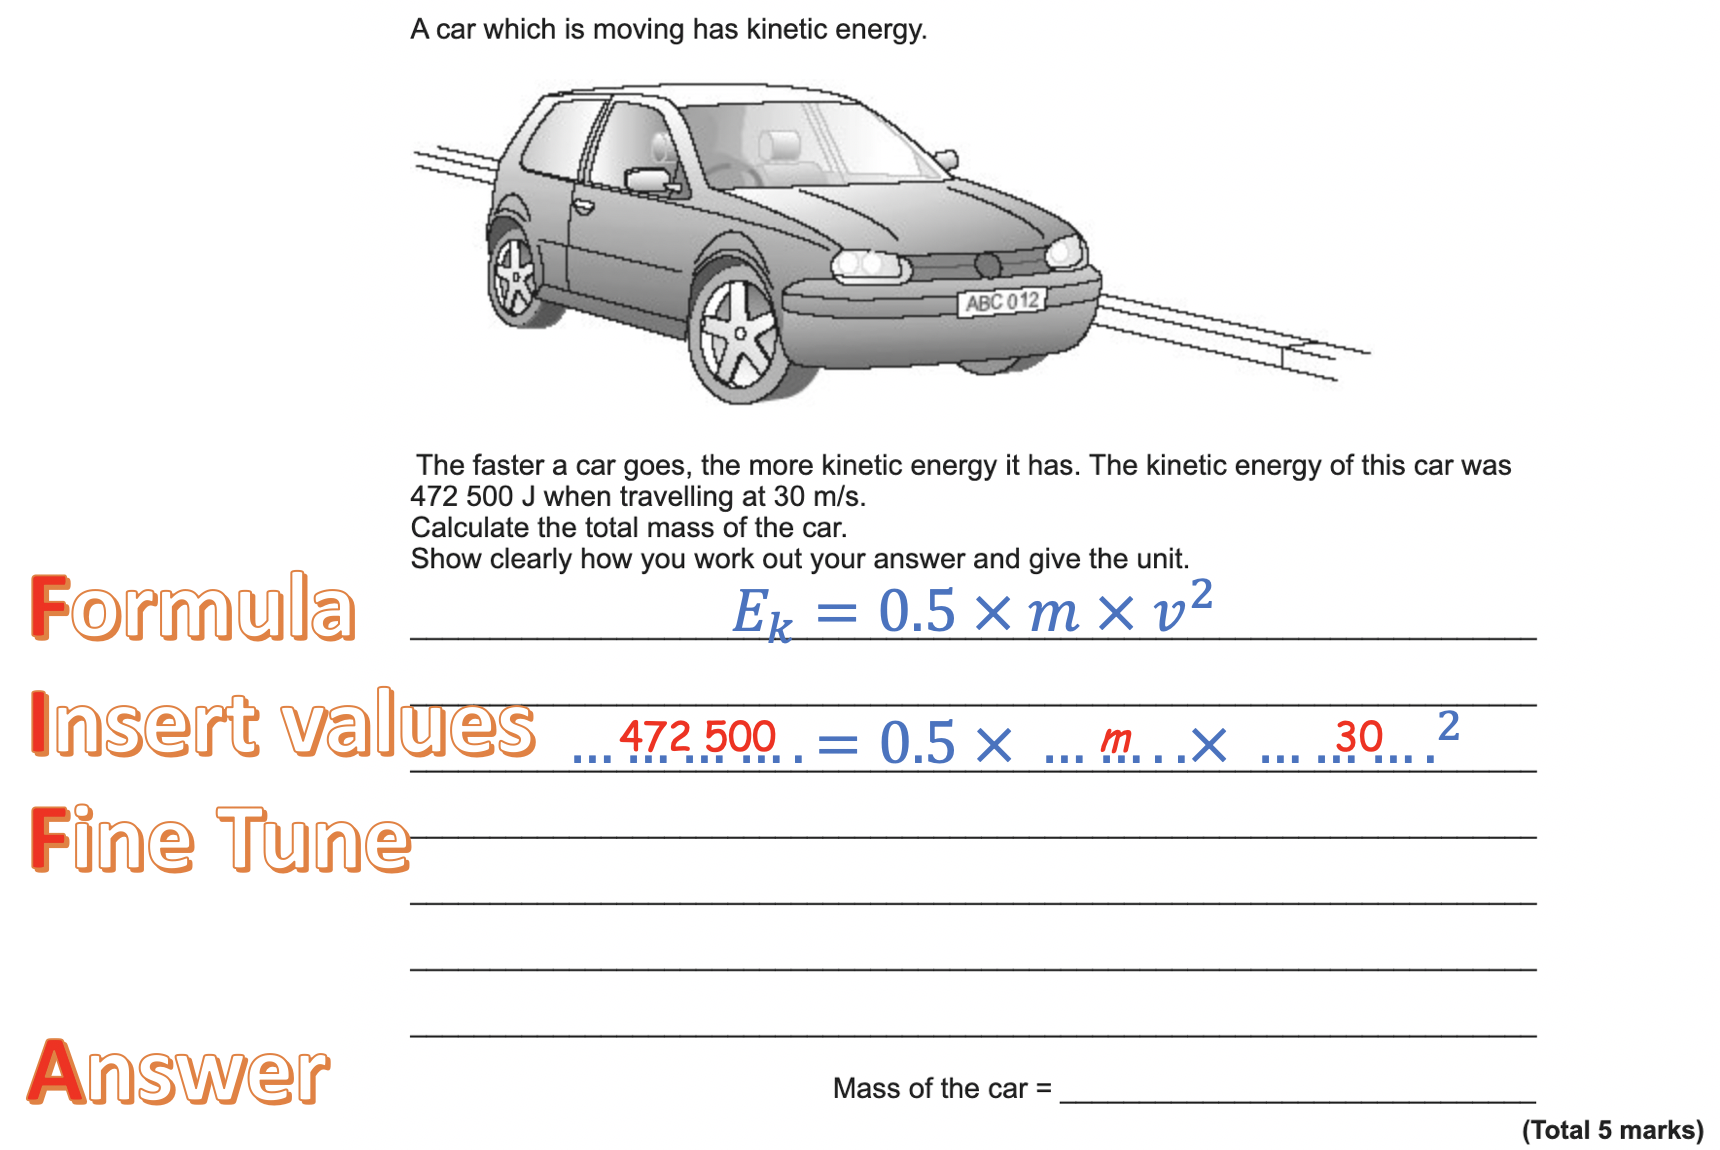
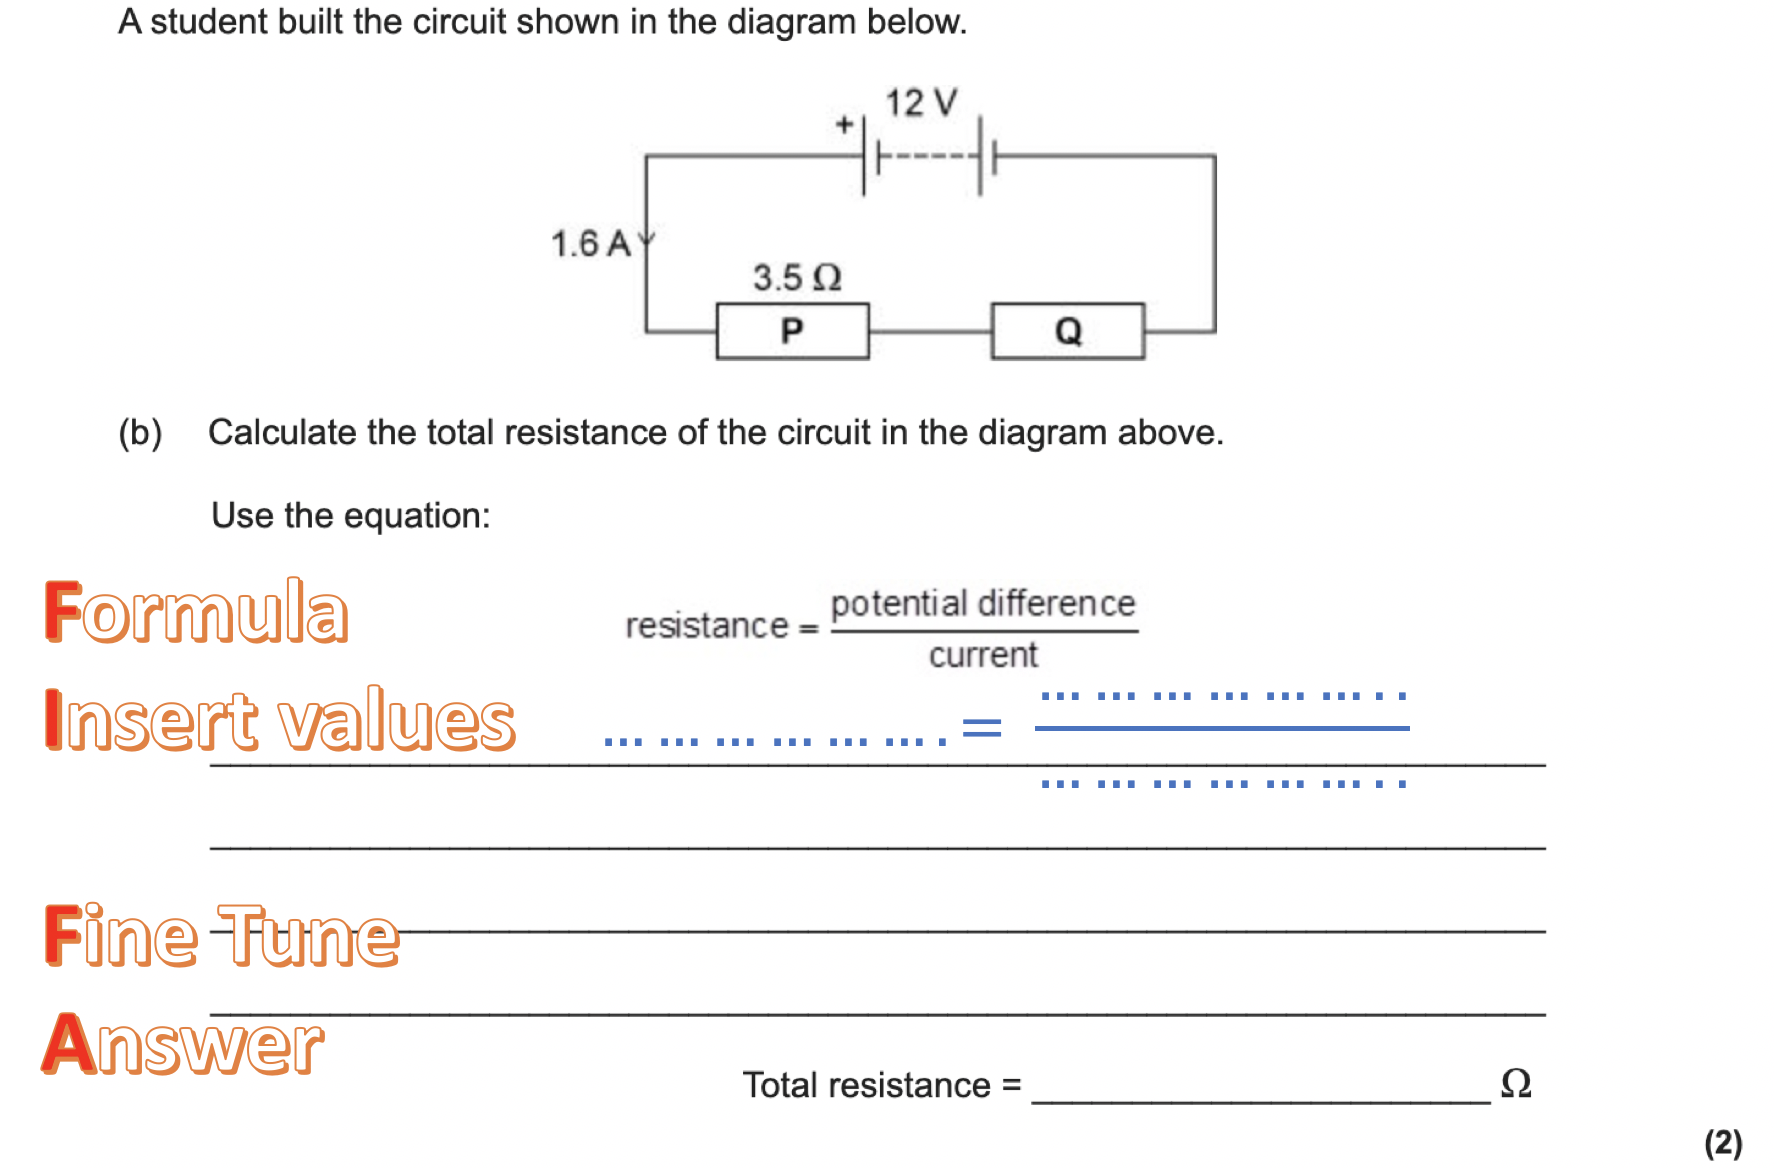
(For more on using the ‘FIFA’ mnemonic for calculations, click on this link.)
Easing cognitive load with the s x t = d format
As above, we will assume that a direct calculation of d when s and t are known is trivial. What happens when we need to find s and t, given that they are the only unknown quantities?
- If t and d are known, then we can find s by dividing both sides by t (see Example 3).
- If s and t are known, then we can find t by dividing both sides s (see Example 4).


Examples 3 and 4 have highly similar surface features as well as a deeper level isomorphism and allow a commonality of approach which I think is immensely helpful for novice learners.
Robinson and LeFevre (2012: 411) call this type of operation ‘the inversion shortcut’ and argue (for a different context than the one presented here) that:
In three-term problems such as a × b ÷ b, the knowledge that b ÷ b = 1, combined with the associative property of multiplication, allows solvers to implement an inversion shortcut on problems such as 4×24÷24. The computational advantage of using the inversion shortcut is dramatic, resulting in greatly reduced solution times and error rates relative to a left-to-right solution procedure. […] Such knowledge of how inverse operations relate in a variety of circumstances forms the basis for understanding and manipulating algebraic expressions, an important mathematical activity for adolescents
Conclusion
I think there is a strong case to be made for this mode of presentation to be applied to a wider range of physics contexts for 11-16 year-old students such as:
- Power, so that the definition of power is initially presented as P × t = E or P × t = W; that is to say, we define power as the energy transferred in one second.
- Density, so that ρ × V = m; that is to say, we define density as mass of 1 m3 or 1 cm3.
- Pressure, so that the definition of pressure is initially presented as p × A = F; that is to say, we define pressure as the force exerted on an area of 1 metre squared.
- Acceleration, so that a × t = Δv; that is to say, we define acceleration as the change in velocity produced in one second.
Please feel free to leave a comment
References
Robinson, K. M., & LeFevre, J. A. (2012). The inverse relation between multiplication and division: Concepts, procedures, and a cognitive framework. Educational Studies in Mathematics, 79(3), 409-428.
Singh, P. (2000). Understanding the concepts of proportion and ratio among grade nine students in Malaysia. International Journal of Mathematical Education in Science and Technology, 31(4), 579-599.