And so they’re back — ripple tanks, that is. And a Required Practical to boot!
They were a staple of Physics teaching when I started my career, but somehow they fell into an undeserved desuetude. I know many fine teachers and excellent technicians who have never used one in anger, which is a real pity, since they are a great teaching tool.
So I present here my eclectic mix of ripple tanks: what you really need to know.
The Basics: “Look at the shadows, honey, look at the shadows!”
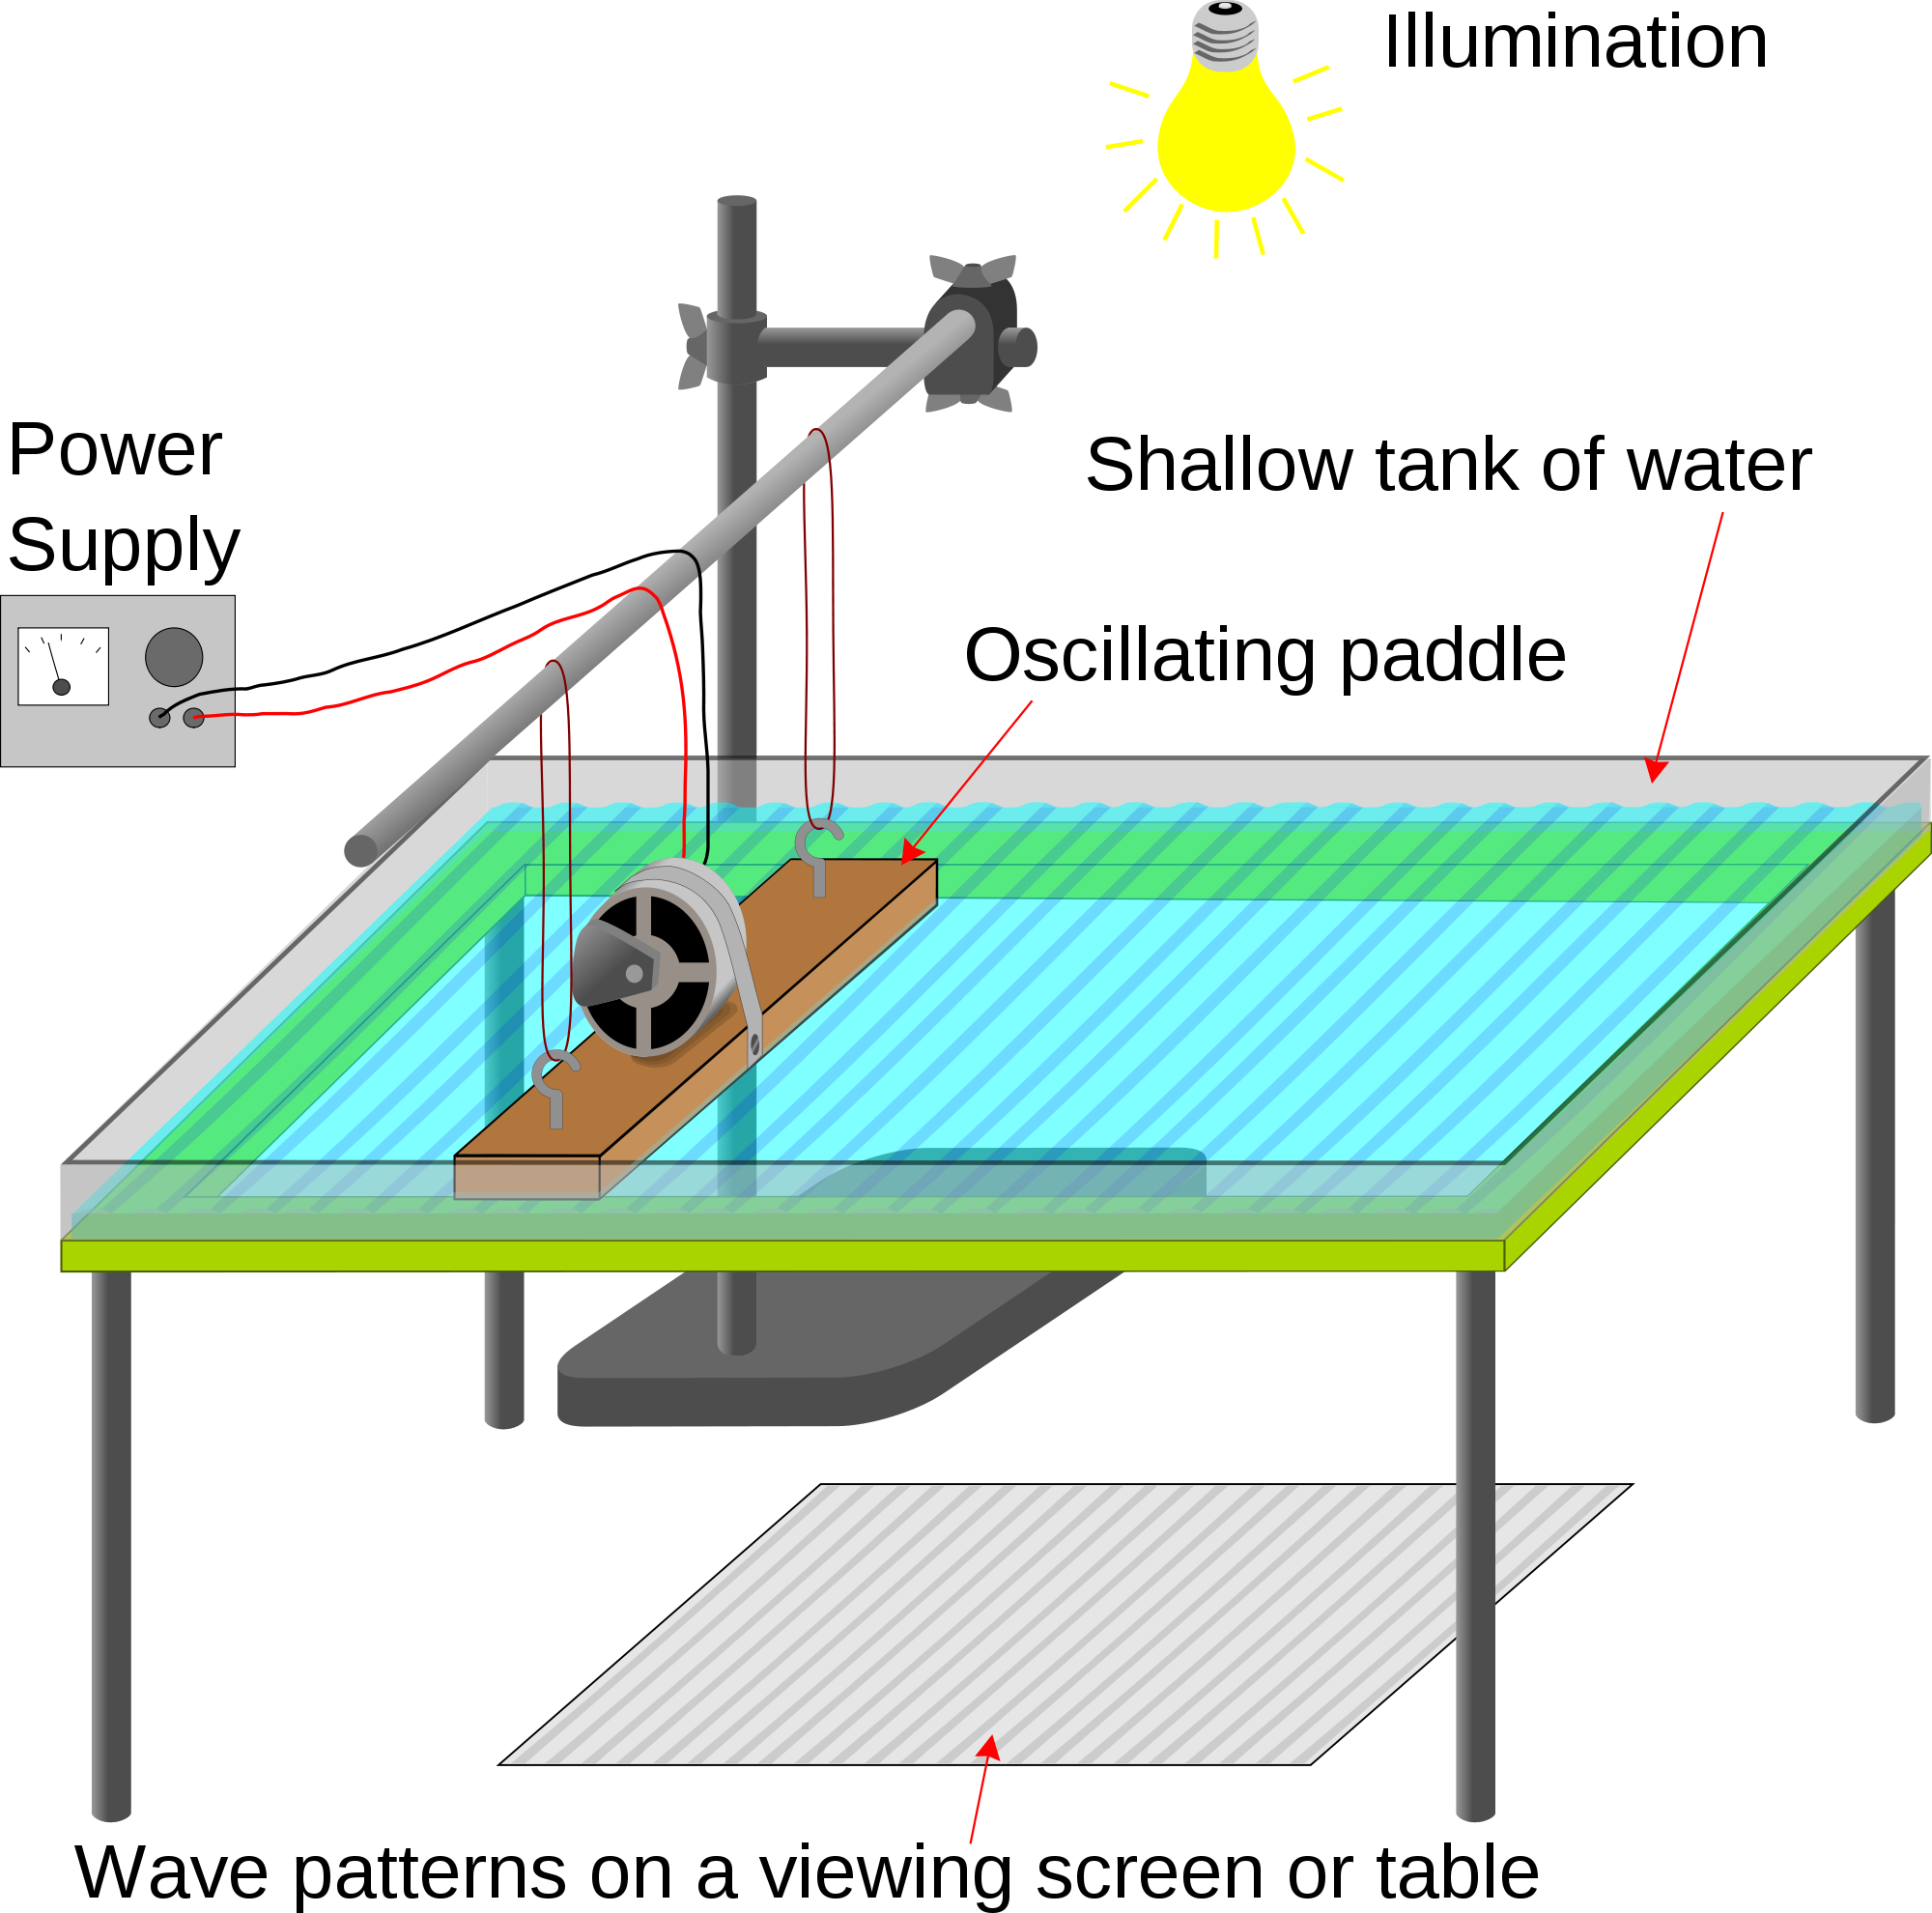
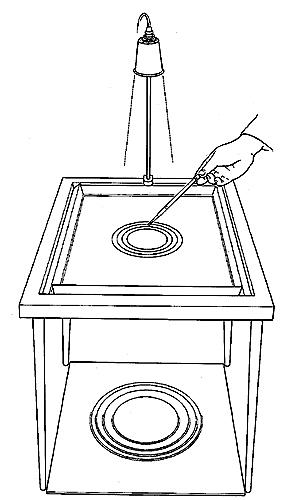
A ripple tank is simply a container with a transparent base. The idea is to put water in the container and make waves or ripples in the water. A light source is positioned above the water so that a screen underneath the transparent tank is illuminated. The crests and troughs act as converging and diverging lenses and produce a pattern of light and dark lines on the screen which enables us to observe wave behaviour more easily.
Remember: look at the pattern of shadows on the floor or bench top, not the ripple tank itself.
If doing this as a demo, sight lines will usually be a bitch for your class. If you have an old fashioned OHP, just put the tank on top of it and project the shadow pattern on to a wall or screen. Alternatively, experiment with positioning the light source underneath the tank and projecting the pattern on to the ceiling.
“Water, Electricity, Children and Darkness: What Could Possibly Go Wrong?”
The ripple tank works best in subdued lighting conditions. Make sure that walkways are free of bags and other trip hazards. If you want students to complete other work during this time, giving them desk lamps (e.g. the ones used by biologists for microscopes) can be useful, and can actually create a nice atmosphere.
Have some towels ready to mop up any water spills.
Most ripple tanks use a low voltage (12V) bulb and vibration generator (0-3 V) to minimise any electrical hazards involved. Be vigilant when plugging in the low voltage supply to the mains and ensure that the mains cable stays dry.
Fill ‘Er Up!
Have a large plastic beaker handy to fill and drain the ripple tank in situ. Don’t try to fill a ripple tank direct from the tap and carry a filled ripple tank through a “live” classroom — unless you want to risk a Mr Bean-type episode. (But you may need to add more water if demonstrating refraction — just enough to cover the plastic or glass sheet used to change the depth.)
In general, less is more. The ripple tank will be more effective with a very shallow 2-3 mm of water rather than a “deep pan” 2-3 cm.
Use the depth of water as a “spirit level” to get the ripple tank horizontal. Adjust the tank so that the depth of water is uniform. (If this seems low tech, remember that it is likely that ancient Egyptians used a similar technique to ensure a level platform for pyramid building!)
It’s also helpful to try and eliminate surface tension by adding a tiny amount of washing up liquid. I dip the end of a thin wire in a small beaker of detergent and mix thoroughly.
And so it begins…
Before switching on the vibration generator etc., I find it helpful to show what a few simple manually-created waves look like using the tank. Using a dropping pipette to create a few random splashes can be eye catching, and then showing how to create circular and straight wavefronts by tapping rhythmically using the corner of a ruler and then a straight edge.

“Look at the flowers, Lizzie; look at the flowers.” 🔫 🌹🌼🌺👀
Well, what do you know. I’m quoting The Walking Dead, without even realising it….
I really love your teaching 💕🔥
Now surely there has to be an application in physical geography too? Coastal processes???….earthquake wave patterns????
Undoubtedly, yes! Shining a desk lamp through a glass of water creates a pretty convincing shadow zone. Nice for teaching P and S waves.
Reblogged this on The Echo Chamber.